Monday, August 3, 2009

Excalibur 2900 9 Tray Dehydrator

Features of the Excalibur Model ED-2900 Dehydrator * Controlled environment for a wide variety of uses, i.e. making fruit roll-ups and trail mixes, drying flower arrangements and herbs, plus various uses for art and crafts, and photos * 9 Trays with 15 square feet of drying area * Includes 9 polyscreen tray liners * Includes 28-page dehydrating guide * 7" FAN/600 WATTS * 1-Year warranty


Beef jerky is one of the most preferred American foods but sometimes buying this in the local grocery store can be quite costly. There are also risks in buying commercially and artificially prepared beef jerky products because of their rich preservative and chemical contents, which are proven to be harmful to the human body.

So what can we do to remedy the cost as well as the content problem of beef jerky products found in the grocery? The answer is simple, don't buy them. Instead, make your own beef jerky in the comforts of your kitchen. The process is pretty simple once you get the hang of it. Today, you will be able to learn the proper way of making your very own home made beef jerky. We'll teach you how.

How Is It Done

The most basic ingredient is obviously the meat. You can choose from a wide variety of meat choices like lamb, pork, but the most common and original choice is the beef meat. You should choose a cut of meat that will save you more time in preparation. Some of the choice cuts are mostly the lean cut portions such as sirloin, top round, eye round, and a few others more. Lean cuts are basically the meat portions with the least fat content. If you are quite unsure which part of the meat to choose, you can always ask the help of the butcher or the attendant.

The next step in the preparation process is the slicing of thin meat strips. There are some butchers who will do this freely for you - all you have to do is ask. There are actually two ways of slicing the meat. One is by following the thread lines of the meat and the other one is by slicing across the thread lines. You must trim any fat included in the meat because the fat contents will not dry out. If you do not do this, the beef jerky won't taste as good. If you are having problems slicing the soft meat, you can always refrigerate it for about thirty minutes prior to slicing. This process freezes the meat a little, making the slicing process a bit easier.

Now that you have prepared the meat slices, you can start marinating it. The most common recipe for marinating is the mixture of cider vinegar and rock sea salt. There are also other recipes you can use in marinating your beef jerky. The whole idea here is to allow the meat to absorb the flavor of the marinade.

If you want your beef jerky a bit stickier, you can put the soaked meat inside the refrigerator in about four up to twenty four hours. If otherwise, just lay it down on the kitchen table where air circulates constantly. After soaking, you can now coat the meat with a variety of seasonings you like.

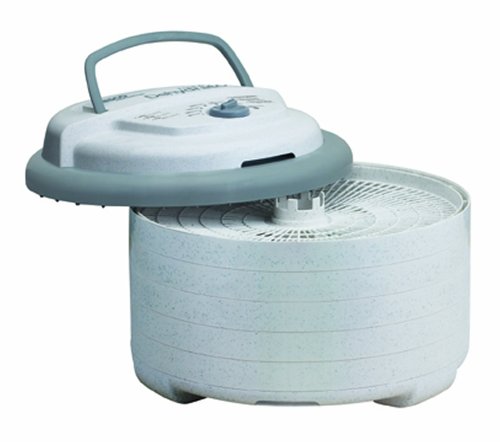
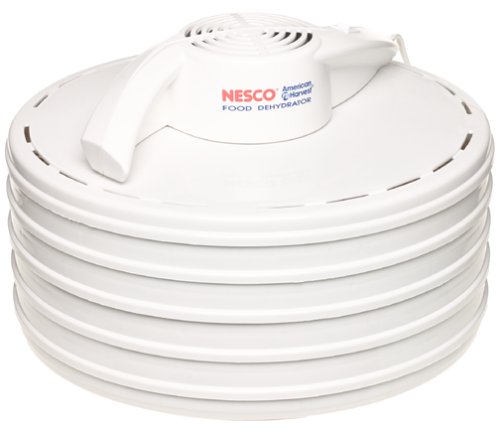
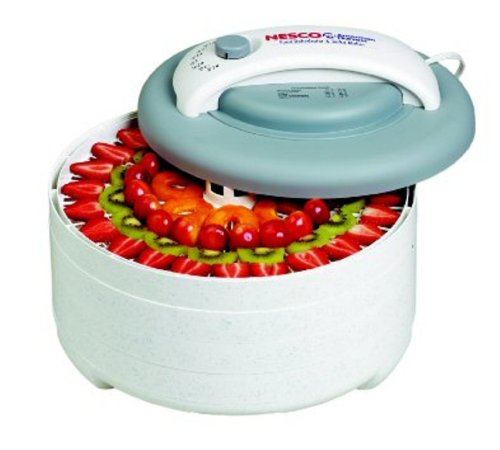
The final step in the preparation of beef jerky is the dehydration process. You can either use a dehydrator or an oven for this. You must make sure that you lay down your meat in an orderly manner so that you can avoid any meat touching one other. When you're using the oven, you should preheat it first and then set the temperature to 150 degrees Fahrenheit, that's about 65 degrees Celsius.

The dehydration process allows the meat moisture to evaporate gradually. This may take about six to twelve hours, depending on the temperature, the level of humidity, and the thickness of your meat slices. You should regularly check the jerky slices if it's dry enough to your preference, but not too dry. To ensure that it is not raw, you may need to cut into it. The final color of each beef jerky must turn into deep brown or burgundy.

When all of the beef jerky slices are ready, you can place them inside plastic bags and store them in the freezer or refrigerator. You can then enjoy your home made beef jerky after a week.

Bernadette Guadiz is an expert writer that has been in the online writing industry for several years. She specializes in SEO and keyword-rich articles for website content, blogs, and even forum postings. Should you wish to hire her services, you can contact her through a safe outsourcing website via http://www.rentacoder.com/RentACoder/SoftwareCoders/showBioInfo.asp?lngAuthorId=6956948

dehydrator

Friday, July 17, 2009

Mary Bell's Complete Dehydrator Cookbook

A guide to food dehydrating shows readers how to make preservative-free dried apple rings, candied apricots, beef and fish jerkies, sun-dried tomatoes, corn chips, herb seasonings, dried fruit sugars, and more. 100,000 first printing. Tour.


Dreaming of making some of your own beef jerky at home but don't want the hassle, so you go out and buy some? Yikes, the price is enough to make you change your mind about making it right? No worries, we have the best beef jerky recipes that will whet your appetite and save you some change too.

It's not as hard as you might think it is. Yes, it takes some time, but the results are well worth it. So, grab a pencil or just print this page out and you are good to go.

This beef jerky recipe is a favorite of many beef lovers and lends itself to many variations on the recipe we have here. You will love this because you can pack it anywhere. Just watch yourself around dogs though or you will become a magnet.

Your choice of cuts is the ticket here, so if you like Sirloin or London Broil, then go for it. Make sure you pick a lean cut though with as little fat as possible. This helps speed up drying time. The next thing you want to do is cut your meat up into very thin, thin strips, say about 1/8" thick. You could have them thicker, but it will slow down drying time.

Hints: ask the butcher to do this for you or in the alternative partially freeze it at home before slicing.

Once you are ready to cut the meat, if the butcher didn't do it for you, cut it with or against the grain. With the grain is way easier to chew, but that is up to you. If you like it REALLY chewy go against the grain. Cut the fat off, as fat does not dry.

Ok, next you need to marinate the meat. You can make your own or buy some from the store. Our suggestion is you use sea salt (that way it won't toughen the meat) and cider vinegar for that tangy flavor. You can leave it as little as four hours, but we seriously suggest going for 24 hours for the best results.

Most of the best beef jerky recipes use marinade, but some people consider marinating optional, because it can make the meat wetter and slow down drying and make the jerky stickier. This is personal preference, and you may choose either way depending on what you prefer. When this stage is done, coat the meat with the spices your like, spray the racks of your dehydrator with non-stick cooking spray and pop them in with enough room around the pieces to let the air flow properly. Try not to let the meat touch.

There you have it. Now all you have to do is wait, check, watch, check again and in about 6 to 12 hours you will have beef jerky that your neighbors will visit you to sample.The trick here is to check it regularly after about 6 hours to test it for the consistency you want. You may have to test cut slices to make sure it isn't raw inside. It should be a deep red or burgundy color when done.

If you are looking for more of the best beef jerky recipes around then take a look at our list of free beef jerky recipes. If you like spicy food then you are going to love our spicy beef jerky recipe. Or if you have a dehydrator at home then view our dehydrated beef jerky recipe for a quick and easy way to make jerky at home.

dehydrator

Sunday, July 12, 2009

Trail Food: Drying and Cooking Food for Backpacking and Paddling

PCKT GD WILDRNESS MED & 1STAID


    After you have harvested your vegetables you might not be sure what you should do with them. Even a large family will have a hard time eating a steady supply of fresh organic vegetables. The way to avoid wastage is to store your vegetables in your home.

    It is true that some vegetables are easier to store than others but most organic vegetables can be stored and saved in some way or another.

    There are actually many ways to store your harvest so do not get frustrated if you feel that you have grown more than you can eat. Many grocery stores sell mason jars and supplies needed for making preserves and canning vegetables along with instructions on how to do this. The same stores sell cheesecloth which is great for placing vegetables on when drying if they are air drying.
    Food dehydrators can also be used for drying your vegetables along with your oven. When using an oven to dry vegetables set it for the lowest setting, usually 140 degrees, and watch carefully to make sure the vegetables are drying out and not roasting.

    Lettuce

    Once you have harvested all of your lettuce you can wash it, remove the core, and pat it dry with a towel. When you have finished store it in a plastic bag and put it in your refrigerators crisping section. This will help your lettuce remain crisp for up to a week.

    Since it is harder to store vegetables for a long period of time it is recommended that you harvest your lettuce and start using it even before it has reached full growth. When it has reached full growth use what you can, store what you can use, and offer the rest to friends and family members. They will appreciate some fresh organic salad to use in their salads or to place on their sandwiches.

    Root Vegetables

    Root vegetables can often store longer than the other vegetables you harvest as long as they are harvested on time and correctly. Make sure your vegetables have not been bruised or damaged during the harvest. If they have been damaged throw them away since the spoilage can spread if you are not careful.

    Many root vegetables such potatoes, carrots, sweet potatoes, and more can be stored in a cool, dark, dry place such as a root cellar or some pantries. Other root vegetables (carrots) can be dried with a food dehydrator or even in an oven set to a very low heat setting. Some vegetables such as turnips can even be stored in a refrigerator crisper, especially if they are going to be used soon.

    Tomatoes

    There are many ways to store tomatoes and that is a great thing since tomatoes are popular with many organic gardeners. Tomatoes can be stored well on a counter top or in a window sill if they are still a bit green. They can also be stored in the refrigerator.

    Some people will dry tomatoes for later use in sauces or even preserve them. Tomatoes preserves either sweet preserves with ripened tomatoes or pickle preserves with green tomatoes can be a winter time treat.

    Onions

    Onions will store wonderfully in any dry, dark place. As long as the onions have not been bruised and have no sign of moisture they can be stored in a pantry or attic for a long time.

    Beans and Peas

    Beans and peas can often be harvested as needed but once it is time to store them there are several methods that can be used. Peas and beans can both be stored in bags in the refrigerator for several days. They also can be canned with the proper equipment. Beans can also be dried which is a popular way to store them. Once beans are dried and bagged they can later be soaked and cooked.

    Corn

    Corn can be stored in the refrigerator or, once the husk is removed, frozen for a long time. The kernels can also be dried, stored, and creamed at a later date.

    Learn about the redbud tree and the weeping cherry tree at the Tree Facts site.

    dehydrator

    Saturday, July 11, 2009

    Nesco All-in-One Food Dehydrator Kit, Model# FD50-WHC

    Everything needed to dry fruit, vegetables, jerky and more. 500 Watts power plus patented coverage flow for even drying. No more rotating trays. U.S.A.


    The raw food weight loss diet is one of the most hyped-up diet fads in recent years. It has been endorsed by celebrities, approved by doctors and nutritionists, and is the subject of many weight loss books. Its claims are certainly worth looking into: according to its proponents, its impossible to gain weight on raw food, and you can eat as much as you want without gaining an ounce!

    Of course, such claims should be taken with a grain of salt. Before starting a raw food weight loss diet, its important to know its risks and benefits. Read on to learn more about raw food diets and what they can do for you.

    What is it?

    The raw food weight loss diet promotes the consumption of uncooked and unprocessed plant foods. By uncooked, they mean subjecting food to temperatures above 116oF, which is believed to destroy enzymes that help the body absorb nutrients. Fresh fruits and vegetables, nuts, grains, sprouts, seeds, and seaweed make up most of the diet.
    Raw food proponents believe that eating right is only part of the process that make up a good life. According to them, cooking deprives food of its life force and makes eating simply a means of sustenance, rather than part of ones overall well-being.

    How much raw food?

    Its near impossible to limit yourself entirely to raw foods. The raw food weight loss diet recommends that raw food make up around 75% of your diet; any more that and youre at risk for vitamin and mineral deficiencies. Raw food also includes meat and seafood: raw shrimp, sashimi, and rare to medium rare meats. However, most raw food dieters prefer plant foods because they are lower in fat and preservatives.

    What are the risks and benefits?

    Raw foods contain little to no saturated fats, trans fats, and sodium. These are the most common culprits of serious diseases such as obesity, heart disease, diabetes and cancer. A study featured in the Journal of Nutrition shows that a raw food weight loss diet significantly lowered cholesterol and triglyceride levels. Raw foods are also high in antioxidants, which help fight free radicals that contribute to cancer risk. Other nutrients abundant in raw foods are fiber, folate, potassium, and magnesium. Proponents of the raw food weight loss diet also have more energy, clearer skin, and better digestion.

    One common reaction to the raw food diet is detoxification symptoms, which indicates that the body is flushing out toxins. Symptoms include nausea, mild headaches, and food cravings. They usually last several days and may be more severe in people whose previous diet was rich in meat, sugar and sodium. Raw food diets are also not recommended for children, pregnant and breastfeeding women, anemics, and people at risk for osteoporosis.

    What cooking methods are allowed?

    Raw doesnt mean you have to eat foods right off the counter. There are ways to prepare your foods without breaking the 116oF mark. Here are some techniques you can use.

    1. Blend vegetables together to create a dip or salad.

    2. Make a healthy shake using fresh fruits.

    3. Dress salads with fresh juice extracts instead of prepared dressings.

    4. Soak dried fruits and nuts to enhance their taste and make them easier to digest.

    5. If youre eating grains or seeds, you can eat them young or sprouted. Eat them together with citrus fruits to improve iron absorption.

    6. Replace processed drinks like coffee, tea, and soda with homemade juice or purified water.

    What will you need?

    If youre considering a raw food weight loss diet, you will need to adapt your kitchen to your new lifestyle. Be sure to have the following:

    A food dehydrator. Dehydrators remove water from your food, making them easier to store for longer periods. It uses temperatures below or just above boiling, so youre still within the 116oF limit.

    A juice extractor. Fruit and vegetable extracts are a major part of the raw food weight loss diet. Its not just for making juiceyou can also use extracts to flavor your food or create salad dressings.

    A blender, chopper or food processor. This helps save time when chopping or mixing your vegetables.

    Glass containers. If youre sprouting your seeds and grains, put them in large glass containers. This allows you to check their progress at a glance. Plastic and metal containers also leave residues which may affect the taste of your food.

    Phillip England is a weight loss expert and Author of the popular report "The Ultimate Weight Loss Secret". To receive your free information on the secret that doctors, and health companies either don't know, or don't want you to know, please see http://www.theultimateweightlosssecret.com/secret

    dehydrator

    Wednesday, July 8, 2009

    Nesco American Harvest FD-75PR 700-Watt Food Dehydrator

    The NESCO Professional Food & Jerky Dehydrator has more power than most dehydrators -- 700 watts -- which means faster drying time. You will have results in hours, not days. The top mounted fan with patented Converga-Flow action pressurizes air downward through the outer ring and horizontally across each individual tray, converging at the center, for fast, even drying. No need to rotate trays. The adjustable thermostat allows you to dry different foods at proper temperatures (95-155 F), providing the flexibility to produce the best drying results. As your needs grow, the Professional Food & Jerky Dehydrator can be expanded up to 12 trays.


    Ethanol is a biofuel. Biofuels are basically alternative energy sources made from living matter. Unlike Fossil Fuels, such as oil, which come from nonliving materials. Although it sounds like a great idea on the surface many countries are experiencing rising grocery costs as Ethanol production mounts. But why is this and does it affect you?

    The most commonly used type of biofuel today is called E85 which is a blend of gasoline and ethanol. Basically it is 15% gasoline and 85% ethanol. The ratio of this mixture is adjusted according to weather temperatures, so during Winter months it takes more gasoline in the mixture to operate.

    Now if everyone could afford a vehicle which used E85 this would be a huge step in reducing or reliance on oil. But the truth is many of us cannot and the vehicles and E85 stations are not being promoted to the public.

    But the real problem with E85 and Biofuels comes from the fact that the production is causing food shortages which raise your grocery bill. But how is this?

    The start of this chain reaction from producing biofuel is corn. Corn is the primary food from which Ethanol is produced. And since farmers raise this crop there is only so much land for it to be grown on. And while supply for corn has grown the farmers struggle to keep up.

    With this increased demand corn has become very profitable to grow. Farmers are sacrificing growing other products such as Soy and Wheat to have more land to grow corn. So instead of a shortage of just one crop, Corn, we now have a shortage of three, Corn, Wheat, and Soy.

    These are staple crops. Meaning that many of the products you buy everyday from the Grocery store is produced from these. Resulting in raising your grocery bill and a shortage of food that is distributed to the poor and underdeveloped countries.

    An alternative to biofuel and rising grocery bills is available. Water. The most abundant natural resource on the Planet.

    With an inexpensive and easy to install kit your everyday vehicle can achieve increased gas mileage ranging from 30 percent to 50 percent and more. This is achieved by using a small electrical current from your battery to release Hydrogen gas from water. This is then mixed with your vehicle's fuel/air mixture.

    To see how this incredible alternative energy source can benefit you and save you money at the fuel pump and help combat rising grocery costs please visit http://www.water-as-gas.com

    dehydrator

    Nesco American Harvest FD-61 Snackmaster Encore Dehydrator and Jerky Maker

    This convenient dehydrator makes great tasting, healthy snacks & jerky! Introducing the Snackmaster?? Encore???. It's Grey top and marbled design features 500 watts of drying power, and generates maximum speed and quality for dehydrating fruits, vegetables, beef jerky, and venison jerky. Helps dry food in hours, not days like ordinary food dehydrators. The top mounted fan eliminates the worry of liquids dripping into the the heating chamber!You can make delicious beef jerky, turkey jerky, fish jerky, trail mix, homemade yogurt, apple snacks, banana chips, dried soup mixes, dried tomatoes, watermelon, cantaloupe, honeydew, mangoes, papaya and other dried fruits at a fraction of the cost. Make dried herbs and spices; also make potpourri and dried flowers for any occasion.


    Halloween has always been a favorite time of year for me. Not only is it my birthday, but the air is clean and crisp, the leaves have turned colors and its just a very pretty time of year.

    Id like to share some fun Halloween ideas and recipes with you:

    Halloween cookie cutters are a must. You can use these cookie cutters on bread to make Halloween sandwiches. Kids love jack-o-lantern shaped sandwiches. You can spread their favorite sandwich topping on the bread once its cut.

    Purchase M&Ms from a store that sells specific colors. Buy orange and green M&Ms and then use them in your favorite chocolate chip cookie recipe substituting the M&Ms for the chocolate chips.

    You can also put those same M&Ms in your favorite rice krispy treat recipe. Its amazing how these two colors transform recipes into Halloween recipes.

    Look for mini cookie cutters. They can often be found in kitchen specialty shops. If you find pumpkin mini cookie cutters, these work great on cheese. Buy sliced cheese. Cut the cheese with the mini cookie cutters and then put the slice of round cheese on a Ritz cracker.

    Prepare your favorite brownie recipe and then top with candy corn pieces.

    Make hamburgers and use your cookie cutters on full size slices of cheese. Serve open faced so that the pumpkin or ghost shaped cheese is on top.

    Many stores sell spinach pasta. Green pasta with red sauce is very Halloween looking to kids.
    Make english muffin pizzas. Add sauce and cheese and then cover with pepperoni slices. Use pineapple chunks to make eyes, nose and mouth.

    What would Halloween be without pumpkin flavored items? Here are a few pumpkin recipes for you:

    Pumpkin Dip

    2 8-ounce packages cream cheese, softened

    1 large 30-ounce can of pumpkin

    4 cups powdered sugar

    2 teaspoons cinnamon

    2 teaspoons ginger

    Mix everything together and serve. Kids love to dip both fruit and cookies into this dip.

    And what about pumpkin muffins? I love pumpkin muffins warmed with butter on them:

    Pumpkin Muffins

    3 1/3 cups flour

    3 cups sugar

    2 teaspoons baking soda

    1 1/2 teaspoons salt

    1 teaspoon cinnamon

    1 teaspoon nutmeg

    1/4 teaspoon ground ginger

    1 cup oil

    4 eggs

    2/3 cup water

    2 cups pumpkin

    Mix all dry ingredients together in a bowl. Add the remaining ingredients and mix. Pour into muffin tins. Batter will rise, so only fill the muffin tins 2/3 of the way full. Bake at 350 degrees for about 20 minutes.
    Decorating your table can be fun also. Use a combination of blacks and oranges. Use cat or witch shaped bowls. I have a friend who owns plates, creamers and tea pots in the shape of cats. You can also sprinkle your M&Ms and candy corn on the table. The kids can eat the decorations.

    Enjoy Halloween with your kids and their friends at home with all of the above treats and ideas.

    Audreys mom always entertained when she was growing up. Audrey learned to prepare for large groups and has often entertained 15-30 people in her home at a time. You can find more great recipes at http://www.recipe-barn.com

    dehydrator

    Wednesday, July 1, 2009

    Nesco All-in-One Food Dehydrator Kit, Model# FD50-WHC

    Everything needed to dry fruit, vegetables, jerky and more. 500 Watts power plus patented coverage flow for even drying. No more rotating trays. U.S.A.


    Any regular grocery shopper is familiar with the chain stores and the monotony they represent: a meat department that is either mediocre in selection and quality or jaw-dropping in price; and ethnic aisles that do not even cover the basics. The citizens of France eat more than baguettes, but you wouldn't know that from your corporate food aisle.

    It's time to go back to eating steak that tastes like it was purchased from a butcher's counter rather than torn off of your car tire. We have been conditioned to accept meats that are drier than British comedy and more discolored than a tie-dyed shirt, but alternatives often exist in your area. Family-owned markets often carry meat products that are sourced from the best providers and fresher than the Corporate Beef. And local grocers also take the time to seek out the international foods that we want-we live in a melting pot, so why are we still lacking the variety in our diets than the original settlers of this country did?

    Try some specialty foods created by real chefs in small town markets, and rediscover that preparing food is actually an art! There is more to life than flat pop and steaks so dry that they may spontaneously combust. You may, however, have to go beyond the strip mall that sits off of the freeway exit in order to find the fresh, locally-owned choice. I'm telling you, family markets are where you need to go for great meats and specialty food.

    Wondering where you can get some of these great meats? Check out http://www.franklinmarketbasket.com to see their mouthwatering selection.

    dehydrator

    Saturday, June 27, 2009

    Nesco American Harvest FD-75PR 700-Watt Food Dehydrator

    The NESCO Professional Food & Jerky Dehydrator has more power than most dehydrators -- 700 watts -- which means faster drying time. You will have results in hours, not days. The top mounted fan with patented Converga-Flow action pressurizes air downward through the outer ring and horizontally across each individual tray, converging at the center, for fast, even drying. No need to rotate trays. The adjustable thermostat allows you to dry different foods at proper temperatures (95-155 F), providing the flexibility to produce the best drying results. As your needs grow, the Professional Food & Jerky Dehydrator can be expanded up to 12 trays.


    For years my family and I have been making jerky, what started out as a fun family pastime is now more of a competition. Before dehydrators were common we had to do it the old fashion way in the oven with long drying times, these days with the new and improved dehydrators the drying time has been cut way down what took two days now can be done in a few hours.

    When shopping for your first or a new dehydrator there are a few things to keep in mind. First is weather to go with a top down unit or a bottom based unit, I prefer the newer top down versions, mainly because I like my jerky a bit on the moister side which requires you leave more marinade on the meat which tends to drip down through the trays and gets on the drying coil on the bottom, while this will not effect the drying time or the unit that much it is allot harder to clean up.

    The second consideration is the wattage of the dehydrator, the higher the wattage the faster the meat will dry but the catch comes in at the price of the unit, the higher the wattage the more you are going to shell out.

    Supplies are pretty ease to get, I'm finding seasonings in local stores as well as buying online, after you get a few batches under your belt you can start to get creative with the seasonings and drying times, I'm not a real fan of super hard jerky so I cut the recommended drying time back about an hour. I recommend the Nesco line of dehydrators that is the brand I'm using now with a top down drying method.

    If you are new to jerky making or just thinking about it I highly recommend it and don't forget get the whole family involved, that's where the real fun come in.

    For more information and recipes

    Jerky is a way of life! start the fun

    dehydrator

    Friday, April 3, 2009

    Nesco American Harvest 5-Tray FD-35 425-Watt Snackmaster Dehydrator

    Drying apple slices in just five hours and beef jerky in seven, this 425-watt dehydrator is exceptionally fast for its price range. Its patented hot-air circulation system ensures not only speed but uniformity, so foods dry evenly. Each of the five trays is 13-1/2 inches in diameter and 1/2 inch deep (the plastic dehydrator stands 10 inches high), providing more than 12 square feet of tray space for drying lots of fruits, vegetables, herbs, and flowers at one time. Available separately is a two-tray accessory pack that expands the dehydrator to seven trays. Also available separately are accessories for drying fruit rolls, soups, and sauces and for making jerky from ground meat. Accompanying the dehydrator is a detailed instruction booklet with a drying-time chart for various foods and recipes for cooking with dried foods. --Fred Brack


    For years my family and I have been making jerky, what started out as a fun family pastime is now more of a competition. Before dehydrators were common we had to do it the old fashion way in the oven with long drying times, these days with the new and improved dehydrators the drying time has been cut way down what took two days now can be done in a few hours.

    When shopping for your first or a new dehydrator there are a few things to keep in mind. First is weather to go with a top down unit or a bottom based unit, I prefer the newer top down versions, mainly because I like my jerky a bit on the moister side which requires you leave more marinade on the meat which tends to drip down through the trays and gets on the drying coil on the bottom, while this will not effect the drying time or the unit that much it is allot harder to clean up.

    The second consideration is the wattage of the dehydrator, the higher the wattage the faster the meat will dry but the catch comes in at the price of the unit, the higher the wattage the more you are going to shell out.

    Supplies are pretty ease to get, I'm finding seasonings in local stores as well as buying online, after you get a few batches under your belt you can start to get creative with the seasonings and drying times, I'm not a real fan of super hard jerky so I cut the recommended drying time back about an hour. I recommend the Nesco line of dehydrators that is the brand I'm using now with a top down drying method.

    If you are new to jerky making or just thinking about it I highly recommend it and don't forget get the whole family involved, that's where the real fun come in.

    For more information and recipes

    Jerky is a way of life! start the fun

    dehydrator

    Monday, March 30, 2009

    Nesco American Harvest FD-61 Snackmaster Encore Dehydrator and Jerky Maker

    This convenient dehydrator makes great tasting, healthy snacks & jerky! Introducing the Snackmaster?? Encore???. It's Grey top and marbled design features 500 watts of drying power, and generates maximum speed and quality for dehydrating fruits, vegetables, beef jerky, and venison jerky. Helps dry food in hours, not days like ordinary food dehydrators. The top mounted fan eliminates the worry of liquids dripping into the the heating chamber!You can make delicious beef jerky, turkey jerky, fish jerky, trail mix, homemade yogurt, apple snacks, banana chips, dried soup mixes, dried tomatoes, watermelon, cantaloupe, honeydew, mangoes, papaya and other dried fruits at a fraction of the cost. Make dried herbs and spices; also make potpourri and dried flowers for any occasion.


    Do cooking measurements matter? When a recipe calls for a pinch of this and a dash of that, does it really matter how much you put in? What will happen if you leave an ingredient out?

    If you're an inexperienced cook, you wonder about the answers to these and other questions. Let's take the mystery out of cooking measurements once and for all.

    What's a Pinch or a Dash?

    A pinch of an ingredient (usually a spice) is literally the amount of the ingredient that can be held between your thumb, your index finger, and your middle finger. A small pinch is the amount of an ingredient that can be held between your thumb and one finger (take your pick which one you want to use). A dash, on the other hand, is a measurable amount - less than one-eight of a teaspoon but more than one-sixteenth.

    Converting Cooking Measurements

    Follow this table to convert U.S. measurements to metric:

    1/5 teaspoon...1 ml

    1 teaspoon...5 ml

    1 tablespoon...15 ml

    1 fluid ounce...30 ml

    1/5 cup...50 ml

    1 cup...240 ml

    2 cups (1 pint)...470 ml

    4 cups (1 quart)...95 liter

    4 quarts (1 gal.)...3.8 liters

    1 oz. weight...28 grams

    1 pound...454 grams

    What If It Gets Left Out?

    Including all the minor ingredients is more important in baking things like cakes, cookies, and pastries, than it is in meat loaf, omelets, and salads. Generally speaking, it's a good idea to follow the recipe. Whoever wrote the recipe experimented with the cooking measurements to get them just right.

    Now, if you know you can't stand the taste of cumin, and you want to substitute oregano for cumin in a meat loaf recipe, that's one thing. But leaving ginger out of ginger spice cookies is just wrong.

    Measuring Tools

    The importance of cooking measurements has led to a whole industry of cooking measuring cups and spoons. One of the most popular cooking measuring cup sets today is a blue ceramic set that looks just like a big coffee cup, marketed by Nigella Lawson the beautiful and famous television chef.

    The most popular measuring spoons are heart-shaped measuring spoons by RSVP International. These spoons have arrow handles and heart-shaped measuring spoons. They make the user smile every time they use them.

    The final cooking measurement device every cook needs is a scale. The best scales are digital, with the ability to accurately weigh items in bowls or plates or on slips of waxed paper.

    Echo Wang is a contributing Editor for cooking-tips Find out which cooking products, treatments & solutions will continue to be beautiful at any time. Our site is dedicated to providing information about cooking well options so you can continue to do it perfect, if want to more information, please visit Cooking Measurements Inexperienced Cook

    dehydrator

    Saturday, March 14, 2009

    food pantrie dehydrator and seed sprouter

    SPROUT SEEDS FOR MAKING WHEATGRASS OR HIGH ENERGY FOOD FROM SPROUTS. DEHYDRATE FOODS NATURALLY WITHOUT ELECTRICITY. DRY JERKY - APPLES - APRICOTS - ONIONS - MUSHROOMS. CHOCKING HAZARD - CONTAINS SMALL PARTS - NOT FOR CHILDREN UNDER 3


    STEP 1

    When you are considering a raw food diet, start with a good colon cleanse which will make the transition to a raw food diet a whole lot easier. This will prepare you both physically and emotionally for the change.

    A colon cleanse could be as simple as taking 2 tablespoons of grounded flaxseeds with your normal daily diet for about 2-4 weeks. You can also choose to go on a strict rigid fast such as The Master Cleanse.

    This will clear out your colon and put you in a "ready" state of mind.

    Explore all the colon cleanse possibilities and choose any one you feel most comfortable applying. This will ease you gently and comfortably onto the next stage of eating majority raw.

    STEP 2

    Most people feel so refreshed and fantastic after a colon cleanse that they are ready to go full blast 100% on a raw food diet right from the off. If this is the case for you, don't spoil the momentum, go for it and charge ahead. Others may use the cleanse to take little tentative steps, working their way up bit by bit. either way, this is the time to take stock and prepare yourself for what lies ahead.

    STEP 3

    Beware of the weird and wonderful gourmet raw food recipes that's being touted in recipe books and other websites. Ignore all these at first and stick to basic, as few as possible ingredients. With so much ingredients and preparation and clean ups you will fall off the wagon in no time.
    Stick to basic, clean, short recipes. Only consider raw gourmet dishes from time to time as a special treat for yourself when you're flush with cash and have plenty time on your hands.

    STEP 4

    Consider purchasing a dehydrator (a piece of equipment which lightly heats the food without destroying the precious enzymes) this will allow for easier transitioning as it changes the texture of the produce, making them crunchy, crispy and interesting, reminiscent of cooked food. You can make crackers, breads and bases for raw fruit cakes.

    STEP 5

    Start each and every morning with a huge smoothie or a large bowl of mixed fruit and nut. Lunch and dinner will be your normal foods keeping it as healthy as possible. Have fruits as snacks in between meals. Do this for two weeks.

    After two weeks of having a raw breakfast, extend it now to having a raw breakfast and a raw lunch. Make lunch a huge smoothies with plenty of greens and/or superfoods. Have a crunchy salad, adding olives or avocado if you need that bit extra. Make this the biggest meal of the day. Have a small healthy cooked meal for dinner. Carry this out for another two weeks.

    After having most of your meals raw for the last two weeks, you are ready to go all the way. (some may prefer to continue having at least one cooked meal per day). Now include your raw dinner making sure it's light and quick to prepare

    Make it easy going raw and get really motivated. Grab some free reports and enjoy some quick and easy recipes, go to http://www.beginnersrawfoodguide.com/begin-raw-form.html

    dehydrator

    Monday, March 9, 2009

    Mary Bell's Complete Dehydrator Cookbook

    A guide to food dehydrating shows readers how to make preservative-free dried apple rings, candied apricots, beef and fish jerkies, sun-dried tomatoes, corn chips, herb seasonings, dried fruit sugars, and more. 100,000 first printing. Tour.


    Specializing in drying certain foods may mean that people are specializing in buying the right food dehydrator for the job. Picking up a food dehydrator on the way home from work or ordering a food dehydrator without knowing anything about it may mean people are not buying the right one for the food they are drying. Most of these appliances dry every type of fruit and vegetable but those looking to dry beef jerky and fruit leathers will want to make sure they purchase the product they will need to do that. Not every one of these appliances are equipped to dry jerky or leathers so finding the ones that will do what customers need it to do is essential to quality food drying.

    Those who make specialty jerky such as venison jerky will want to make sure that the dehydrator they choose can handle the task. Drying large amounts of jerky larger products are the best way to dry this food evenly and quickly. When choosing a larger appliance making sure that the customer is buying the right food dehydrator to dry jerky will bring the best in quality. Most everyone loves the taste of jerky so those who are known for their great tasting jerky need products that will enhance the flavor in a quick amount of time.

    Children who love to eat fruit roll ups may want to talk dad into buying one of these appliances for mom. Choosing one of these products that allows moms to make their own fruit leathers will also let moms pack it in lunches throughout the entire year. Not only will everyone have homemade fruit leathers but mom will be able to save a little in her grocery budget. Making sure that the product that is being purchased is designed to handle leathers is important in making sure the leather will taste and cure correctly. Some of these items dry fruits, vegetables and even jerky but may not be able to dry the fruit leather so it is important to purchase the right product and accessories. Drying herbs and spices has never been easier than in one of these dehydrators. To be able to dry the herbs and spices there may be some added accessories that are needed depending on the instructions that are provided with each product. Growing herbs and spices are a delight for many and being able to dry them and use them in recipes gives great flavor to favorite dishes.

    No matter what the specialty is or the quantity making sure that the right product is purchased is important in food drying success. When fruit leather is not dried right it can be very messy to clean up and discouraging as well. So making sure every food is dried properly will encourage people to dry these foods again to save money as well as to find their food drying specialty. All of these are only possible to do when the cook is buying the right food dehydrator and putting it to the proper use.

    Michael S Brown
    Top notch food dehydrator information.
    Food Dehydrators

    dehydrator

    Thursday, March 5, 2009

    Making Sauerkraut and Pickled Vegetables at Home: Creat

    Making Sauerkraut and Pickled Vegetables at Home - Klaus Kaufman Features & Specifications Making Sauerkraut and Pickled Vegetables at Home - Klaus KaufmanThis book provides creative recipes for lactic-fermented food to improve your health.With this book, discover the simple remedies and healing agents found in lactic acid-fermented foods. Step-by-step recipes will guide you through centuries-old methods.Great addition to our crock pots!


    All basic Asian cooking equipment list begins with the wok. It stands at the top of the hierarchy and is the primary utensil used. In any Chinese kitchens, the wok is usually manufactured from either steel or heavy-duty iron material. In addition, it is normally attached with two concave shaped handles at the edge of the wok. This wonderful utensil has a long list of benefits. It can be used to apply a multiple types of frying techniques like pan, stir, deep and also steaming food. Hence, it plays an important role in Asian cooking. It serves well when properly maintained. The wok needs to be coated with a thin layer of oil to prevent impacts of low humidity and rust. This is an essential lesson for all budding Asian cuisine chefs.

    Another very common utensil is the claypot. It is also quite fundamental in many Asian homes. It is basically the Asian copy of the stew pot originated from England. But it is obviously different from each other as the claypot is used for stove top cooking while the stew pot is usually placed in the oven. The purpose of the common claypot is to keep its content piping hot after cooking well past meal time.

    Next on the list of good Asian cooking utensil is the steamer. It comes in different sizes notably in the range of six inches in diameter to twelve inches. The steamer is usually constructed from bamboo. This is very useful as it is sufficiently aesthetic to be used as a serving utensil. It is also layered. Therefore, it allows many types of dishes to be served or cooked by stacking one layer on top of another.

    The Asian cooking set is not complete without the cleaver. It is a very flexible tool used for preparing a wide range of dishes. Being manufactured with heavy duty steel, the cleaver can slice bone parts effortlessly. This multi-purpose equipment can be tasked from cutting duck bones to intricate services like slicing vegetables or carving them into beautiful artwork prior serving.

    Abhishek is really passionate about Cooking and he has got some great Cooking Secrets. up his sleeves! Download his FREE 88 Page Ebook, "Cooking Mastery!" from his website http://www.Cooking-Guru.com/770/index.htm. Only limited Free Copies available.

    dehydrator

    Sunday, March 1, 2009

    Colon Health by Dr. Norman Walker

    Colon Health by Dr. Norman Walker Features & SpecificationsColon Health by Dr. Norman Walker Book DescriptionColon Health will take this forgotten part of your body and focus your full attention on it--and you'll never again take it for granted. This book shows how every organ, gland, and cell in the body is affected by the condition of the large intestine.About the AuthorDr. Norman Walker is the longest-lived, widely-known raw-foodist of the modern era. Thousands upon thousands of people credit Dr. Walker's live-vegetable-juice therapy for healing them of "incurable" diseases, including Jay Kordich, known to the world as "The Juiceman." When Jay Kordich had cancer, he met and was tremendously inspired by Dr. Walker. After healing himself of cancer through The Raw-Food Diet and juice therapy, Jay worked with Dr. Walker beginning in the 1940s up until Dr. Walker's death in the mid-80's at an age of well over 100.For more than 100 years, Norman W. Walker, Ph.D., proved through research and experience that well-being and long life go hand-in-hand. Through the non-stop activities of raw-food enthusiasts, such as Nature's First Law, modern day nutritionists and medical researchers are finally discovering the raw truths which Dr. Walker knew and taught throughout the twentieth century. Dr. Walker was living proof that a longer, healthier, more enjoyable life is achieved through The Raw-Food Diet, mental poise, and intelligent body care. Dr. Walker's contributions to the common heritage of humankind began before the turn of the century in London, where as a young man he became seriously ill due to over-work and stress. Unable to accept a sentence of ill-health and early death, Dr. Walker healed himself with living foods and vegetable juices. Among Dr. Walker's greatest contributions was his discovery of the therapeutic value of fresh vegetable juices and in 1930, the development of what would become known as the Norwalk Press Juicer. The present "juicing" craze is direct


    If you want to make a name for yourself as the local neighborhood grill master, you need to have the right tools and accessories. These grilling tools are a must have for backyard chefs everywhere:

    You'll need a nice set of utensils that are well suited for grilling. That means they shouldn't be made of material that will get hot in your hands. They should be big enough that you can reach the back of the grill with them safely, but no bigger. Many bbq tools are made so big that they become difficult to handle. Many a time I've seen a newbie griller use extra long tongs to grab something off the grill only to lose control and drop it on the ground. What a waste!

    Another note about barbeque utensil sets: they usually come with a giant fork. Take the fork and throw it right in the garbage. No self-respecting grill master uses a fork to poke his meat. It lets all the delicious juices pour out!

    Now what other grilling tools do we need? Well, you need to keep your grill clean so that means you'll need a wire brush. You can get these for as little as $5.99 but I recommend going with the $14.99 models. The cheaper ones fall apart and leave little pieces of their wire all over your grill (and in your food if you're not careful). Better to spend the extra couple bucks and avoid the aggravation.

    Now let's think about safety. You're going to be working over an open fire so you want to be as careful as possible. The grill will be piping hot and so will dishes, utensils, etc. At the least you should have some sturdy oven mitts handy. But what I recommend is getting a pair of "Ove Gloves". You can get them for around $12 to $15 and they're so worth it. They're comfortable to wear and can resist temperatures up to 480 degrees! Grab yourself a pair and you'll be glad you did.

    There's just one more grilling tool you need to add to your arsenal: a small spray bottle. No matter how careful you are you're bound to have a flame up from time to time. You'll need to act fast or your whole meal will go up in smoke. If you keep a small spray bottle filled with water handy you can quickly spray down flames before they get out of control.

    These are the grilling tools that will make your barbeque experience a joy. You can pick up more grilling tips and some delicious recipes at http://how-to-barbeque.com

    dehydrator

    Tuesday, February 24, 2009

    Nesco American Harvest FD-75PR 700-Watt Food Dehydrator

    The NESCO Professional Food & Jerky Dehydrator has more power than most dehydrators -- 700 watts -- which means faster drying time. You will have results in hours, not days. The top mounted fan with patented Converga-Flow action pressurizes air downward through the outer ring and horizontally across each individual tray, converging at the center, for fast, even drying. No need to rotate trays. The adjustable thermostat allows you to dry different foods at proper temperatures (95-155 F), providing the flexibility to produce the best drying results. As your needs grow, the Professional Food & Jerky Dehydrator can be expanded up to 12 trays.


    Lobster rolls are an omni present offering of many locations throughout New England as well as the Canadian Maritime Provinces. It is a sandwich that is filled with lobster meat. Traditionally, they contain all of the meat that a one-pound lobster can offer.

    The lobster meat is combined with mayonnaise, such chicken or tuna salad, and then served on a grilled hot dog bun. In many cases, it is served on a lightly toasted New England style hot dog bun. New England hot dog buns are different from ordinary hot dog buns in that they have no crust on the sides. The top of the roll is split as well, rather than being sliced like ordinary hot dog buns. The lobster roll is served with the opening of the sandwich on top, rather than being on the side.

    The filling of the sandwich is made of cooked lobster meat, mayonnaise, and a variety of other ingredients. Traditionally, lobster roll stuffing can contain diced celery and or scallions. Another variation is using drawn butter in place of mayonnaise. Drawn butter can also be used with the mayonnaise. A lobster roll sandwich can also have lettuce and lemon.

    In the United States, they are associated with the state of Maine. While Maine seems to get the benefit of the doubt when it comes to all things lobster related, lobster rolls are commonly available at seafood restaurants across the New England states as well as on Eastern Long Island. These delights are available in any area where lobster fishing is common.

    During the summer months, they are a staple summer meal. In Canada, Nova Scotia in particular is fond of lobster rolls. Here they may appear on hamburger buns, baguettes, or other types of bread rolls. Lobster rolls have even been served in pitas. For side dishes, the majority of the time people are given potato chips and dill pickles.

    McDonald's, in an effort to conform to the native diet, has been known to offer the McLobster in restaurants located in New England as well as in the Canadian Maritime provinces. While seasonal, the McLobster is still sold. It has been sold, in years past, for $4.75. McDonald's does not use a New England style roll, merely a toasted roll for their lobster rolls.

    For more information on lobster rolls and other traditional summer treats, please visit http://www.cdkitchen.com

    Joseph Devine

    dehydrator

    Monday, February 16, 2009

    Colon Health by Dr. Norman Walker

    Colon Health by Dr. Norman Walker Features & SpecificationsColon Health by Dr. Norman Walker Book DescriptionColon Health will take this forgotten part of your body and focus your full attention on it--and you'll never again take it for granted. This book shows how every organ, gland, and cell in the body is affected by the condition of the large intestine.About the AuthorDr. Norman Walker is the longest-lived, widely-known raw-foodist of the modern era. Thousands upon thousands of people credit Dr. Walker's live-vegetable-juice therapy for healing them of "incurable" diseases, including Jay Kordich, known to the world as "The Juiceman." When Jay Kordich had cancer, he met and was tremendously inspired by Dr. Walker. After healing himself of cancer through The Raw-Food Diet and juice therapy, Jay worked with Dr. Walker beginning in the 1940s up until Dr. Walker's death in the mid-80's at an age of well over 100.For more than 100 years, Norman W. Walker, Ph.D., proved through research and experience that well-being and long life go hand-in-hand. Through the non-stop activities of raw-food enthusiasts, such as Nature's First Law, modern day nutritionists and medical researchers are finally discovering the raw truths which Dr. Walker knew and taught throughout the twentieth century. Dr. Walker was living proof that a longer, healthier, more enjoyable life is achieved through The Raw-Food Diet, mental poise, and intelligent body care. Dr. Walker's contributions to the common heritage of humankind began before the turn of the century in London, where as a young man he became seriously ill due to over-work and stress. Unable to accept a sentence of ill-health and early death, Dr. Walker healed himself with living foods and vegetable juices. Among Dr. Walker's greatest contributions was his discovery of the therapeutic value of fresh vegetable juices and in 1930, the development of what would become known as the Norwalk Press Juicer. The present "juicing" craze is direct


    There are times when you just have to have that rack of barbecue ribs. Maybe they have been sitting in your freezer since fall and you just cant wait any longer, you just have to have those ribs. But with the cold of winter set in getting out to the grill is more of an exercise in survival making it hard to truly enjoy the barbecue experience. Throw in some snow and wind and the idea of cooking barbecue ribs on the grill goes out the door.

    Now if your are truly hardcore you can put on your snow boots, bundle up in hat, coat and gloves, shovel a path out to the grill, get it lit and hope the wind doesnt blow it out. The next part may be even trickier; actually grilling the ribs. While barbecue ribs arent all that hard to make they do need constant attention. Standing outside in the cold and wind can make this difficult not to mention that its either getting dark out or the sun has already gone down. Grilling in the dark, even with a flashlight, is not easy because its hard to tell if and when the ribs are done.

    Now this doesnt mean it cant be done because many a hard core griller has endured the elements to fix their favorite barbecue dish. But if this isnt youre idea of barbecue fun then there is an alternative. If you have a large crock pot or pot you can put on the stove you can be enjoying tender barbecue ribs in a few hours.

    Heres how you do it.

    Get your crock pot or large pot set up. Pour in some barbecue sauce then set your ribs in the sauce. You may have to cut your ribs into sections if you are doing a rack of baby back ribs. Pour the rest of the sauce over the ribs making sure to cover them well. You want to cook them slowly so dont turn the stove up to high. With a crock pot set them to high to get the temperature up and then turn them down to low and let them simmer. By cooking slow you are looking at letting them cook for two to three hours, or even longer. The flavors of the sauce will work deep into the meat leaving it moist and tender. It will also fill your house with the smell of barbecue, which is good if you like that kind of thing.

    While this isnt exactly the same as cooking barbecue ribs on a grill it is a great way to enjoy the taste of barbecue even on the coldest of winter nights.

    Andrew Bicknell is a barbeque aficionado with a website about barbequing. For more tips for a successful barbeque visit his web site Backyard Barbeque.

    dehydrator

    Wednesday, February 4, 2009

    Nesco¿FD-1018P American Harvest 1000-Watt Gardenmaster Dehydrator and Jerky Maker


    If you live anywhere near a hunter or hunting area, then chances are you are going to get some deer meat. There are some great, easy recipes besides the old, tried and true-deer chili, deer stew, deer roast with vegetables, deer stroganoff, grilled venison tenderloins or chicken fried deer steaks with gravy and mashed potatoes.

    Deer Jerky

    You aren't a true deer connoisseur unless you have tried to make your own deer jerky. You don't have to have a dehydrator; you can use your oven, set on 200-250, with a hot pad stuck in the oven door to let the moist air out. It can take anywhere from 5-10 hours, depending on how chewy you want it. You can use the meat from the ribs, the flank steaks and the scrap meat that doesn't end up ground in hamburger or sausage for this. Keep in mind that the meat you start with, ends up about a half or two thirds less after drying. Marinate inch strips and pieces overnight, in some liquid smoke, Tabasco sauce, Worcestershire sauce, soy sauce, a little seasoning salt, garlic powder and onion powder. Next day, spread meat on wire rack, foil underneath and put in oven until done, 5-10 hours.

    An easy appetizer is Venison Cherry Spread

    1 pkg. of softened cream cheese, to cup of dried or fresh crushed cherries or pie filing and leftover cooked venison, roast or ground, (and a few red pepper flakes if desired for heat) and spread on crackers.

    Venison Roll-ups are another easy appetizer

    Simply slice steaks with the grain to make thin breakfast steaks. Roll around two or three asparagus or green onions, or one of each and secure with a moistened toothpick and throw on the grill until the meat turns brown.

    Venison Roast Pizza is an easy leftover meal

    Get a cooked, prepared pizza dough, or use a loaf of flatbread or French bread, split. Mix 1 pkg. of softened cream cheese with a tablespoon each of: horseradish sauce, ranch dressing, Italian dressing and spread on pizza dough or bread. Top with leftover venison roast or cooked ground venison, onions, pepper, olives or mushrooms, as desired, top with Italian blend or mozzarella cheese, bake at 350 until golden brown and cheese melts.

    Crescent roll Venison Lasagna pie

    Take 2 rolls of crescents and open on a pizza pan or (large round baking pan), spread with tips outward, like a sun shape. Mix together: pound of venison, pound sausage, tomato sauce, onions, peppers and green and black olives, and one pack of dry ranch dressing, prepared as instructions. Once mixed, place in the center of the "Sun", top with shredded cheese, fold all the points towards the middle, and bake at 375 until golden and inside is bubbly.

    Venison Cottage Cheese Pie

    Mix 1 pound of ground venison, mushrooms and onions together and put in a 9" frozen pie shell. In a separate bowl, beat 2 eggs and add 1 cup of cottage cheese and pour over the top of the meat mixture. Bake at 350 for 30-40 minutes until set, or top mixture turns golden brown.

    Whether you're an avid hunter or just someone who enjoys the offerings of a hunter you are sure to impress somebody with these easy venison recipes.

    You'll find lots of single men and women to share your deer cooking with at RedneckAndSingle.com Over 18,000 single rednecks are waiting to meet you for dating, friendship and adventure. Check out http://www.redneckandsingle.com today.

    dehydrator

    Five Easy Steps to a Raw Food Diet

    STEP 1

    When you are considering a raw food diet, start with a good colon cleanse which will make the transition to a raw food diet a whole lot easier. This will prepare you both physically and emotionally for the change.

    A colon cleanse could be as simple as taking 2 tablespoons of grounded flaxseeds with your normal daily diet for about 2-4 weeks. You can also choose to go on a strict rigid fast such as The Master Cleanse.

    This will clear out your colon and put you in a "ready" state of mind.

    Explore all the colon cleanse possibilities and choose any one you feel most comfortable applying. This will ease you gently and comfortably onto the next stage of eating majority raw.

    STEP 2

    Most people feel so refreshed and fantastic after a colon cleanse that they are ready to go full blast 100% on a raw food diet right from the off. If this is the case for you, don't spoil the momentum, go for it and charge ahead. Others may use the cleanse to take little tentative steps, working their way up bit by bit. either way, this is the time to take stock and prepare yourself for what lies ahead.

    STEP 3

    Beware of the weird and wonderful gourmet raw food recipes that's being touted in recipe books and other websites. Ignore all these at first and stick to basic, as few as possible ingredients. With so much ingredients and preparation and clean ups you will fall off the wagon in no time.
    Stick to basic, clean, short recipes. Only consider raw gourmet dishes from time to time as a special treat for yourself when you're flush with cash and have plenty time on your hands.

    STEP 4

    Consider purchasing a dehydrator (a piece of equipment which lightly heats the food without destroying the precious enzymes) this will allow for easier transitioning as it changes the texture of the produce, making them crunchy, crispy and interesting, reminiscent of cooked food. You can make crackers, breads and bases for raw fruit cakes.

    STEP 5

    Start each and every morning with a huge smoothie or a large bowl of mixed fruit and nut. Lunch and dinner will be your normal foods keeping it as healthy as possible. Have fruits as snacks in between meals. Do this for two weeks.

    After two weeks of having a raw breakfast, extend it now to having a raw breakfast and a raw lunch. Make lunch a huge smoothies with plenty of greens and/or superfoods. Have a crunchy salad, adding olives or avocado if you need that bit extra. Make this the biggest meal of the day. Have a small healthy cooked meal for dinner. Carry this out for another two weeks.

    After having most of your meals raw for the last two weeks, you are ready to go all the way. (some may prefer to continue having at least one cooked meal per day). Now include your raw dinner making sure it's light and quick to prepare

    Make it easy going raw and get really motivated. Grab some free reports and enjoy some quick and easy recipes, go to http://www.beginnersrawfoodguide.com/begin-raw-form.html

    dehydrator